Beginner's Treasure: Navigating Your First Diamond Painting Kit
Embarking on your first diamond painting project is an exciting journey into a world of creativity and sparkle. Diamond painting, a blend of cross-stitch and paint-by-numbers, allows you to create dazzling artworks by placing tiny resin diamonds onto a sticky canvas. For beginners, starting with the right kit can make all the difference. This guide will help you navigate your first kit diamond painting, ensuring a smooth and enjoyable experience from the first diamond to the last.
Understanding Your Kit
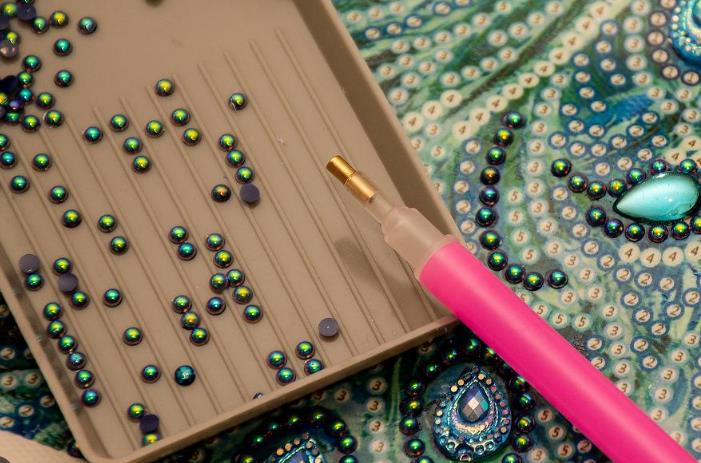
A typical diamond painting kit includes several key components: a canvas printed with your chosen design and marked with symbols, small bags of resin diamonds sorted by color, a diamond applicator pen, a piece of wax or gel to pick up the diamonds, and a plastic tray to hold them while you work. The canvas sizes can range from small (20x20 cm) to large (over 100x100 cm), with the complexity of the design increasing with size.
Choosing the Right Design
For beginners, it's wise to start with a smaller canvas (around 20x30 cm) that won't overwhelm you. Designs with larger colored areas and fewer details are easier to manage and provide a quicker sense of accomplishment. Themes are vast, from serene landscapes and adorable animals to vibrant abstract patterns. Pick a design that truly speaks to you; the more you love it, the more motivated you'll be to finish.
Prepping Your Workspace
Create a Comfortable Setup: Good lighting and a comfortable chair are crucial. You'll be spending several hours on your project, so comfort is key.
Organize Your Diamonds: Use the plastic tray to keep your diamonds sorted by color. Some crafters use additional storage boxes for larger projects, but the tray provided in your kit should suffice for starters.
Start with a Single Color: Begin your project by working with one color at a time. This approach keeps you organized and helps you gradually see your artwork come to life.
Applying the Diamonds
- Dip the Pen in Wax: The wax enables the pen to pick up the diamonds. You don't need much—just enough to make the tip sticky.
- Pick Up and Place Diamonds: Gently press the tip of the pen against a diamond to pick it up, then place it onto its corresponding symbol on the canvas. Repeat this process, one diamond at a time.
Tips for Success
- Take Your Time: Diamond painting is a relaxing hobby, not a race. Enjoy the process as you see your artwork evolve.
- Check Your Work: Occasionally step back to admire your progress and check for any misplaced diamonds.
- Cover Your Canvas: To prevent dust from settling on your sticky canvas, cover the areas you're not working on with the protective film.
Finishing and Displaying Your Masterpiece
Once you've placed the last diamond, take a moment to appreciate your work. To ensure longevity, you can roll a rolling pin over the surface to firmly secure the diamonds. Framing your finished diamond painting not only protects it but also makes it ready for display.
For those eager to start their diamond painting journey, finding the perfect kit diamond painting is the first step towards creating your own dazzling artwork. Whether it's a tranquil landscape, a portrait of your favorite pet, or an abstract design, diamond painting offers a rewarding and relaxing experience, making it a perfect hobby for beginners and seasoned crafters alike.